
(For sale for $30)
My parents are in the process of moving to Chicago, and have been getting rid of a lot of stuff that they’ve had for a while. My dad had accumulated a sizable pile of scrap wood, which I gladly took off his hands for him. So now I have a sizable pile of scrap wood in my garage, and I’d like to turn it into beautiful or useful things.
This is what I came up with first:
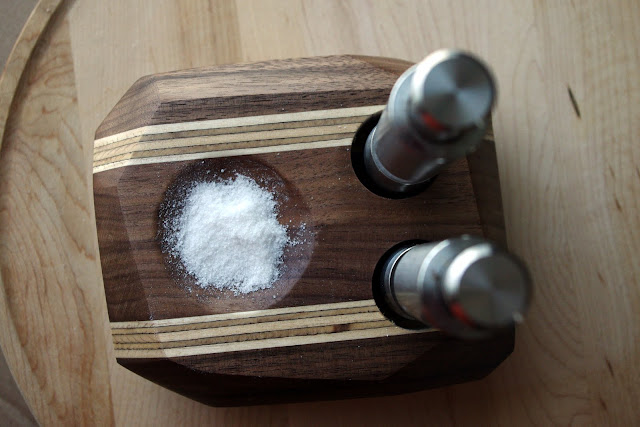
It’s a salt cellar. I saw the idea on a craft blog that I follow sporadically, Wood & Faulk. It seemed easy enough, and a great solution to the problem that Elise and I face every day of our tall, skinny salt and pepper shakers falling over. It’s super annoying.
Want to make your own? Sure you do. Here’s how.

I pulled a couple short walnut boards from the scrap pile. I also had a junky piece of plywood that I wanted to incorporate in the design, because the multiple layers of plywood can look really cool in the right context.

I cut the walnut boards into four 5-6 inch pieces, each about 3 inches tall, then cut two pieces of the plywood into the same shape (roughly). I arranged them to my liking, and then it was time to glue!

I cleaned both sides of each piece, then glued them and clamped them together over night. At this point, you can stay and watch the glue dry, or you can take a break from your hard work and go relax for 24 hours. Or do something productive. Your choice.

Next step is to cut the ends of the glued-together block and make them all nice and square. I forgot to take a picture of that step, but you can use your imagination. Then I ran the thing through my planer over, and over, and over again until it was flat on the top and bottom...

...like this.

This next part requires a belt sander and an aggressive sandpaper. Shape your block however you want...this part is fun! I went for lots of facets and odd angles, but you can take it any direction you want.

The block fought the sander and the sander won.
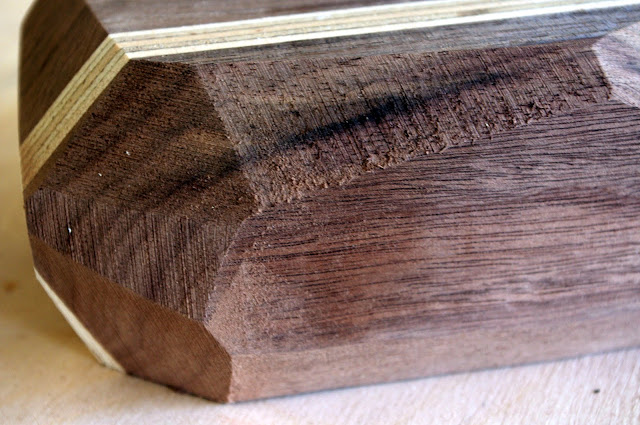
Battle scars.
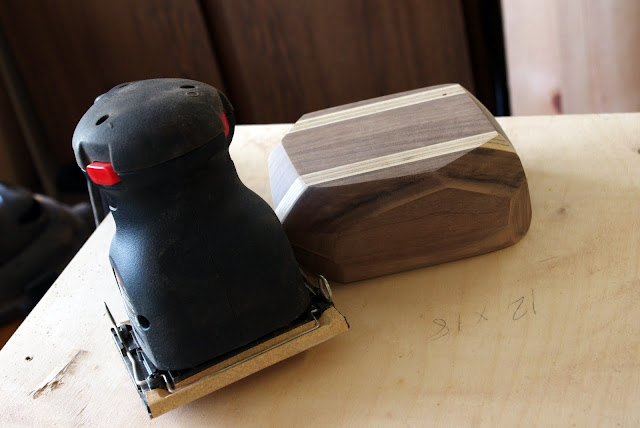
I had to smooth things over, so i hit the freshly-reshaped block with my hand-sander using increasingly fine sandpaper. I started with 60 grit, working my way gradually to 400 grit for a smooth, glassy polish. This takes time, but is well worth it.

With the block shaped and sanded, it's time to drill the holes for the salt and pepper grinders. For this, I used a drill press and a 1" forstner bit, drilling about 2" deep.

Now it's time to dig out the cellar itself. This is not as hard as it seems at first, but you definitely want to practice on scrap wood before you start digging into your nice, fancy block with a chisel. I just drew a circle to outline the cellar, and starting chipping away. The key here is A) Dont' chisel toward yourself (and keep your hands out of the way!) and B) Take very small amounts of wood out with each stroke. If you rush this, you will have unwanted gouges, either in your project or in your body. Neither are desirable.

You should end up with something that looks like this. If you look closely, you can see where I chipped a little outside the circle. Oops.

After a quick sanding of the freshly carved bowl/cellar/whatever you want to call it, I applied a hand-rubbed oil finish. Be sure you use a non-toxic oil, since this will be in direct contact with food.

Grind some salt into the bowl, stick your salt and pepper mills into their new homes, and you're good to go!

Why didn’t I think of that? Very nice.
Thanks! Glad you like it. I can make you one for a special family price…
Lovely..very creative and beautiful. Praying for a peaceful move for your family…
It’s beautiful. I enjoyed the narration as well.
You make beautiful things…you ma-ake beautiful things out of the SCRAPS! Te lumpshen dyart!